

Order a server
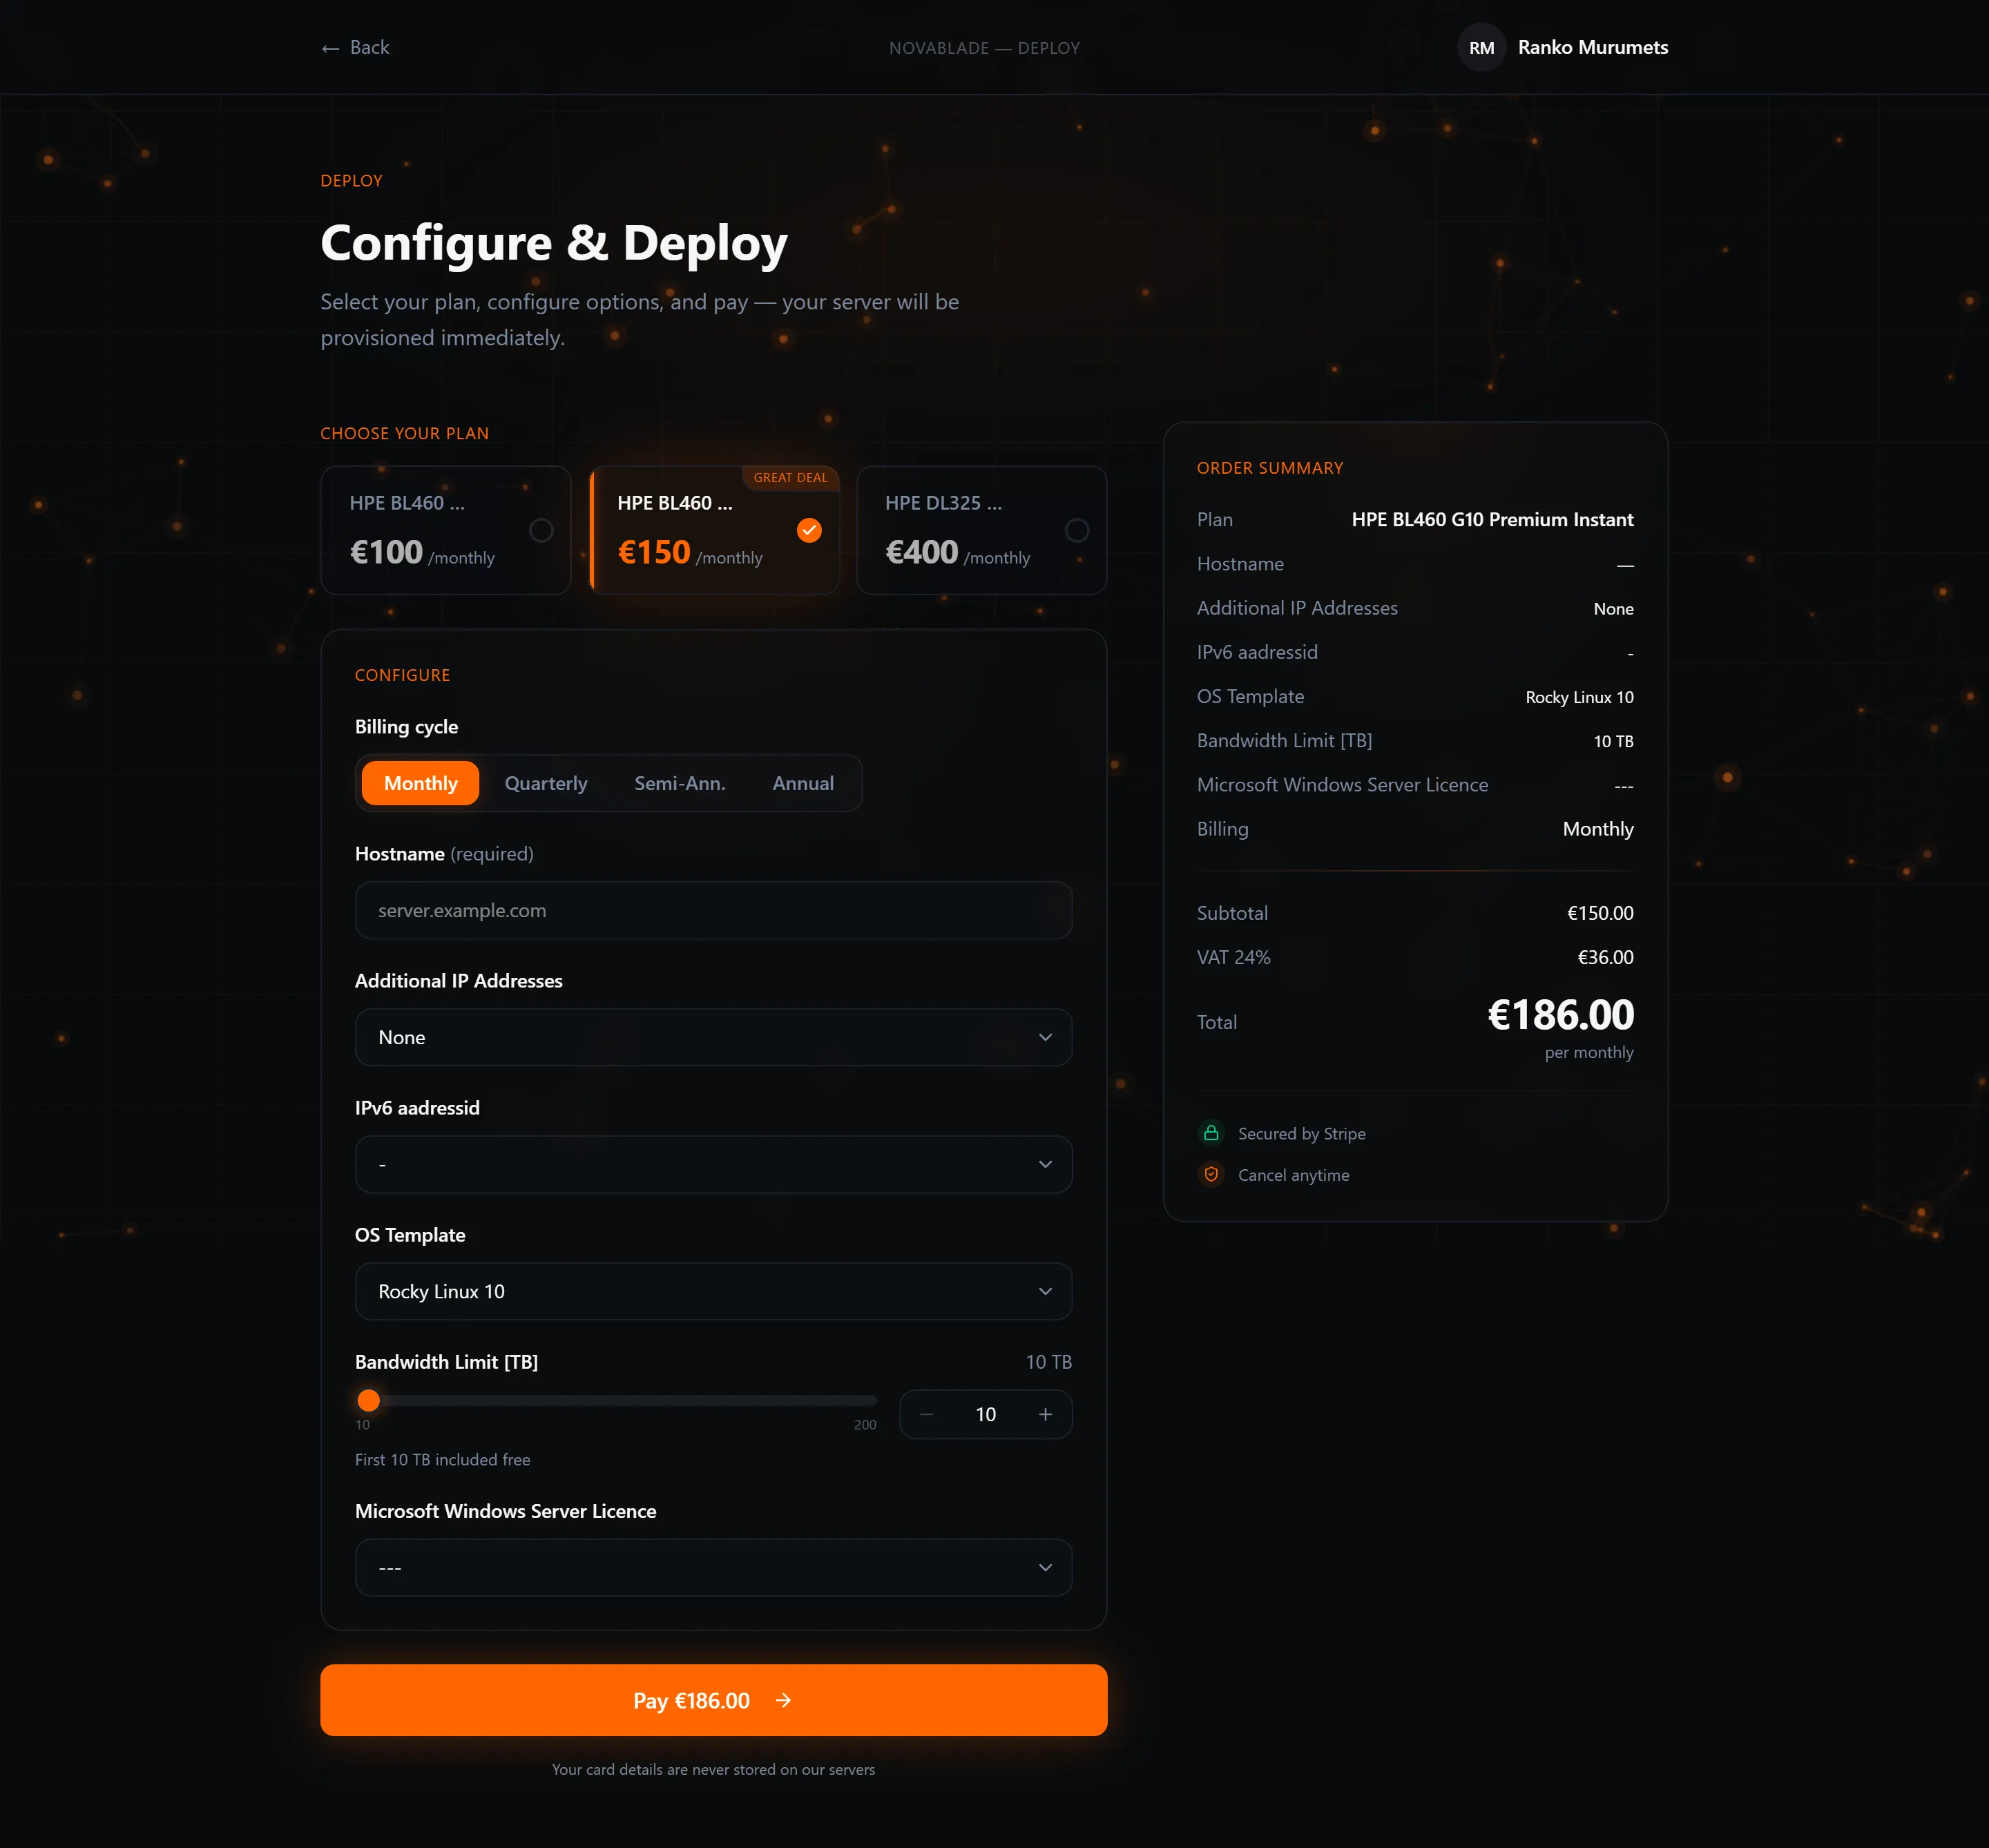
From the Wavecom home page, click Configure on the plan you want. This opens the order configuration page where you set up your server before paying.
Choose a plan
Section titled “Choose a plan”Plans differ by CPU, RAM, storage, and bandwidth. Select the one that fits your workload. You can always add extra IPs at this stage too.
Billing cycle
Section titled “Billing cycle”Pick how often you are billed — monthly is the most common choice. The price summary updates automatically as you change the cycle.
Hostname
Section titled “Hostname”Enter a fully-qualified domain name (for example, server1.example.com). The hostname identifies your server and is applied at provisioning time.
Configuration options
Section titled “Configuration options”Depending on the plan, you may see:
- Sliders to adjust resources such as RAM or CPU cores (where the plan supports it).
- Operating system template — a dropdown of supported Linux and other OS images, grouped by family. Picking a template here means the server arrives with it already installed. You can reinstall a different OS later from your dashboard.
- Data centre — choose the location closest to your users.
- Extra IPs — add additional IP addresses as a quantity add-on.
Price summary
Section titled “Price summary”The sidebar shows a live breakdown:
- Subtotal — the base price for the selected plan and options.
- VAT — calculated based on your country. EU businesses with a valid VAT number receive the reverse-charge (0 % VAT) rate automatically once you are signed in.
- Total — what you pay per billing cycle.
- Due today — shown when the first period is prorated (for example, if you order mid-cycle).
Proceeding to payment
Section titled “Proceeding to payment”When you are happy with the configuration, click Continue (or Create Account if you are new). You will be taken to the payment step.